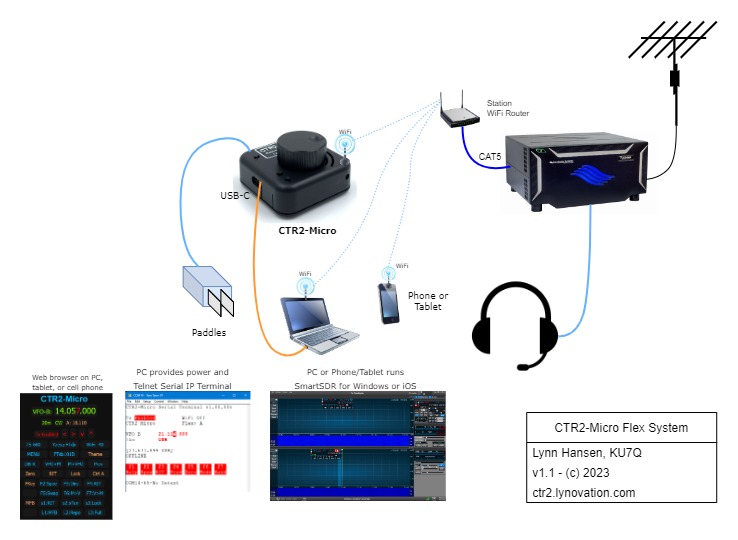
CTR2-Micro is a full featured radio control system. It connects directly to your radio and unlike CTR2-MIDI or CTR2-Dial, it does not require an additional radio control program. I’ll refer to CTR2-Micro as Micro in this document.
You can order a CTR2-Micro in my online Shop.
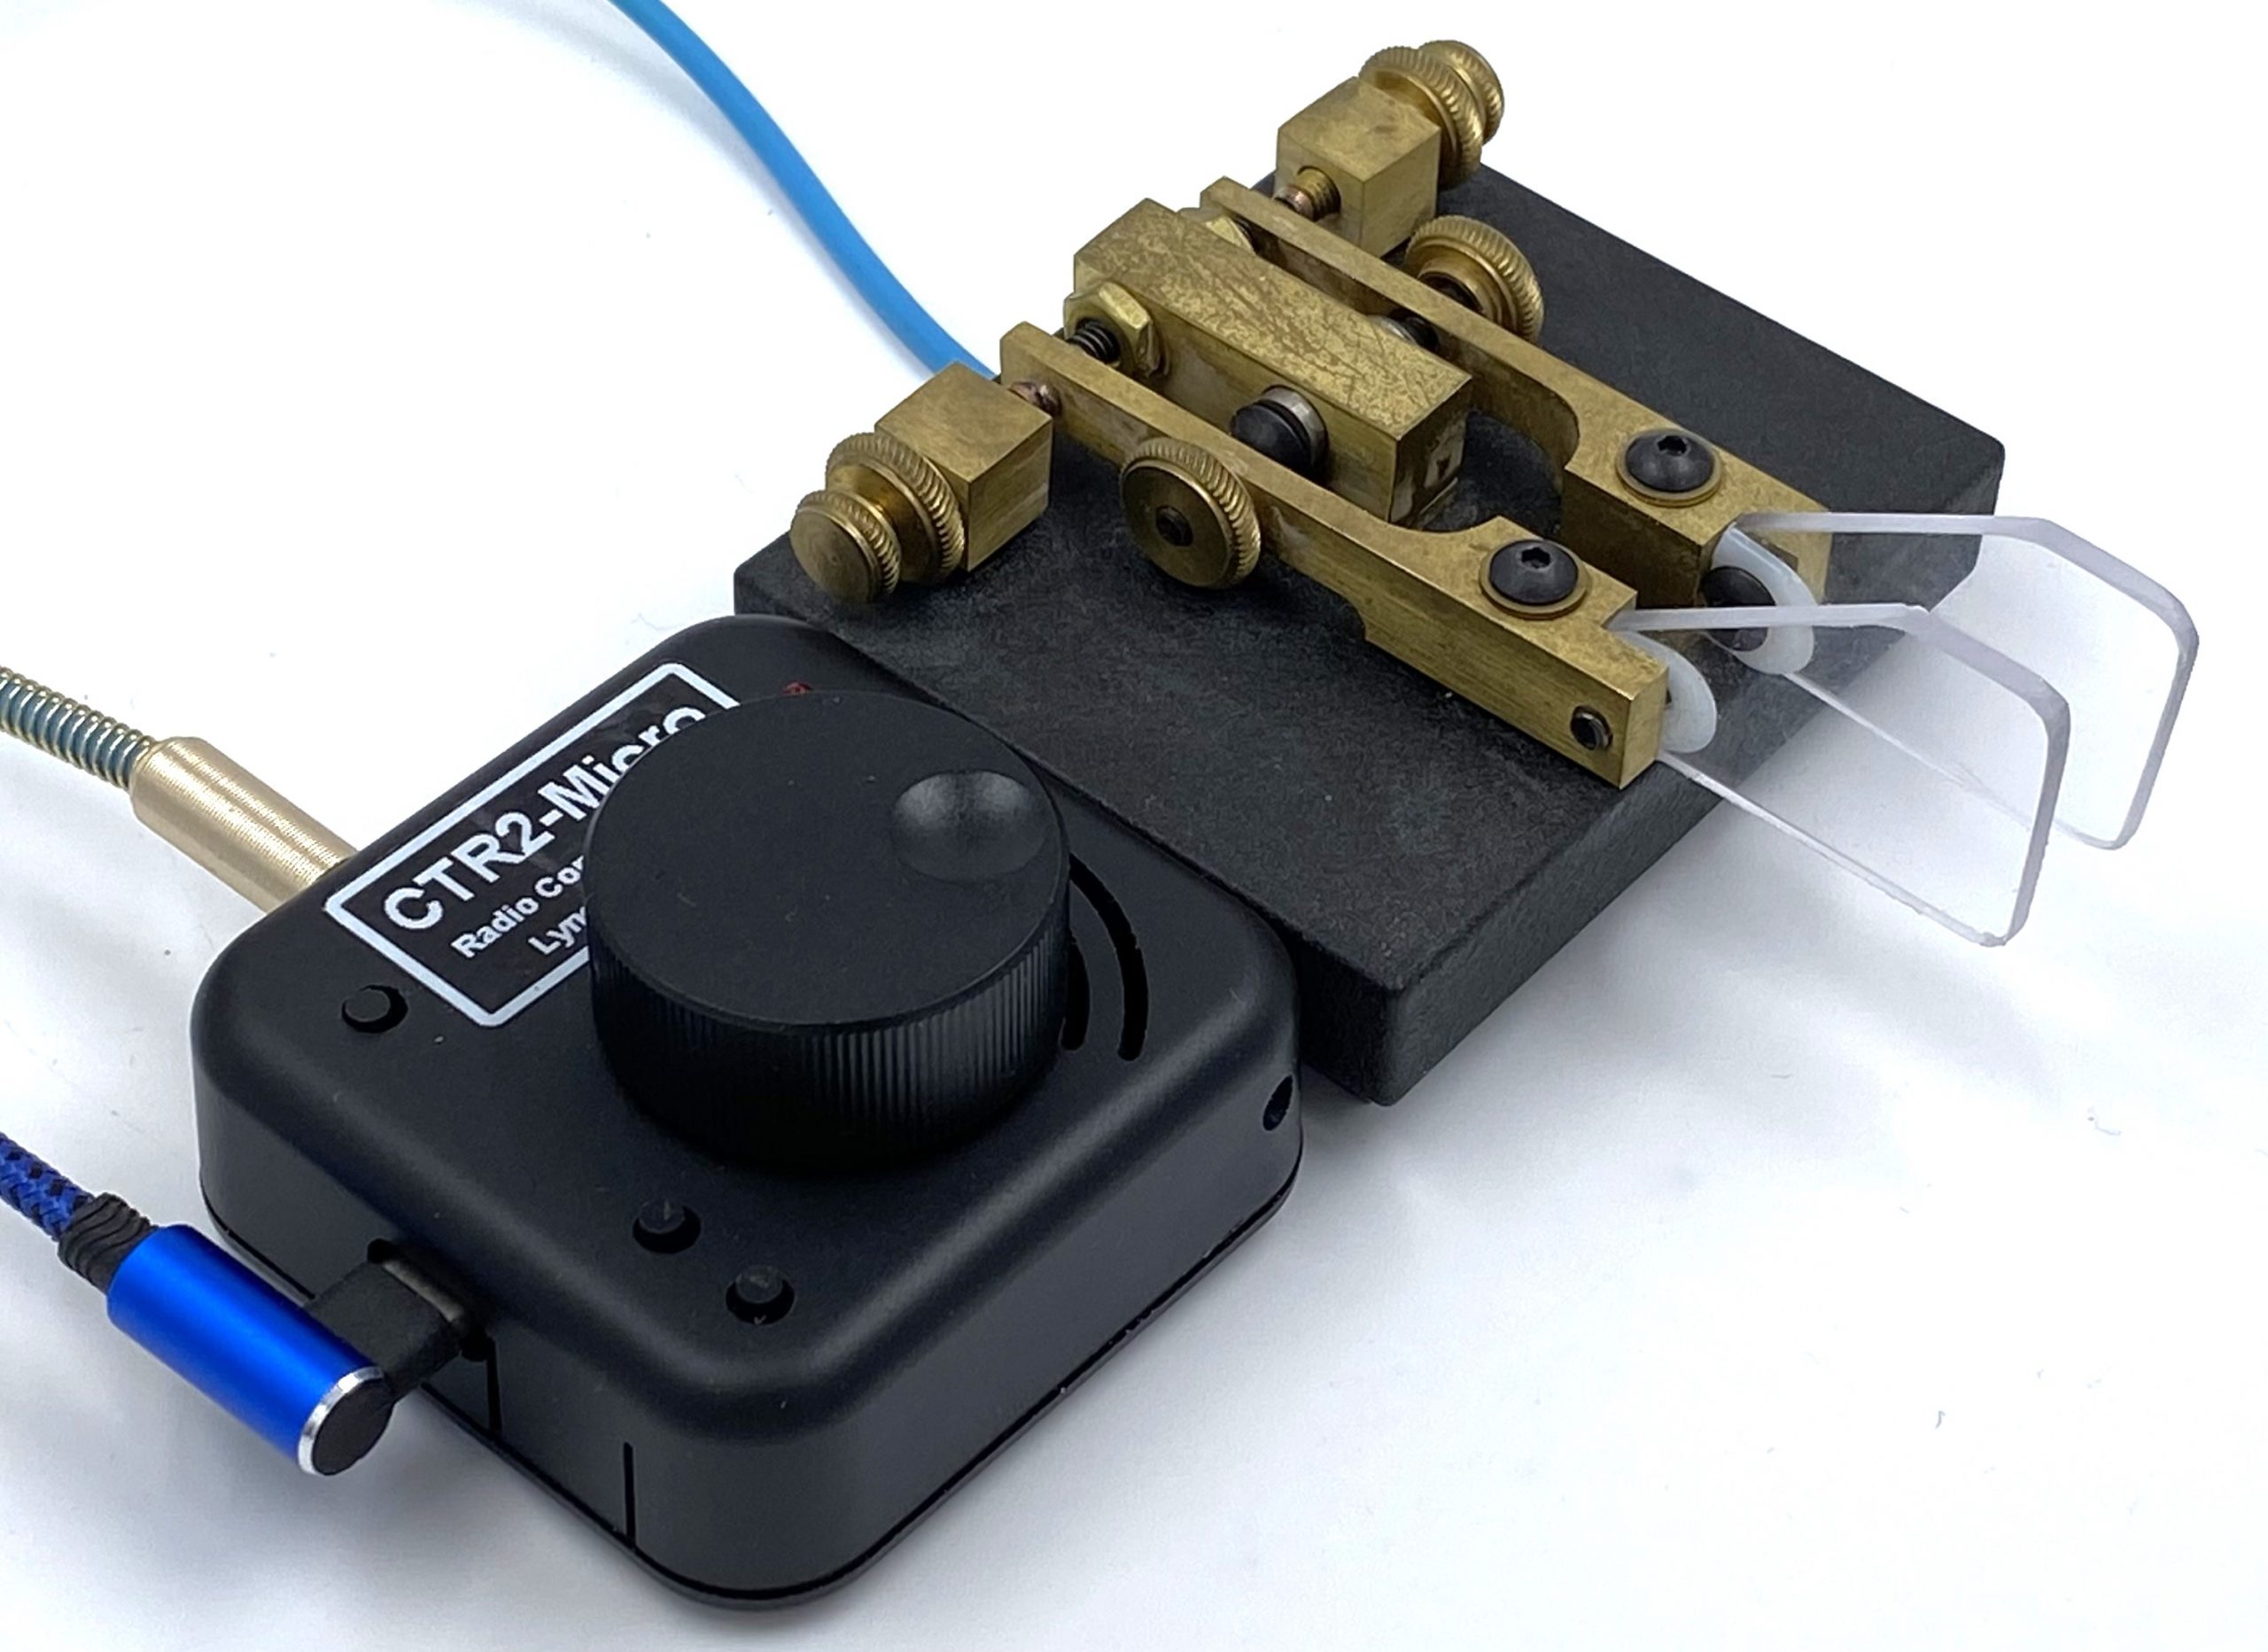
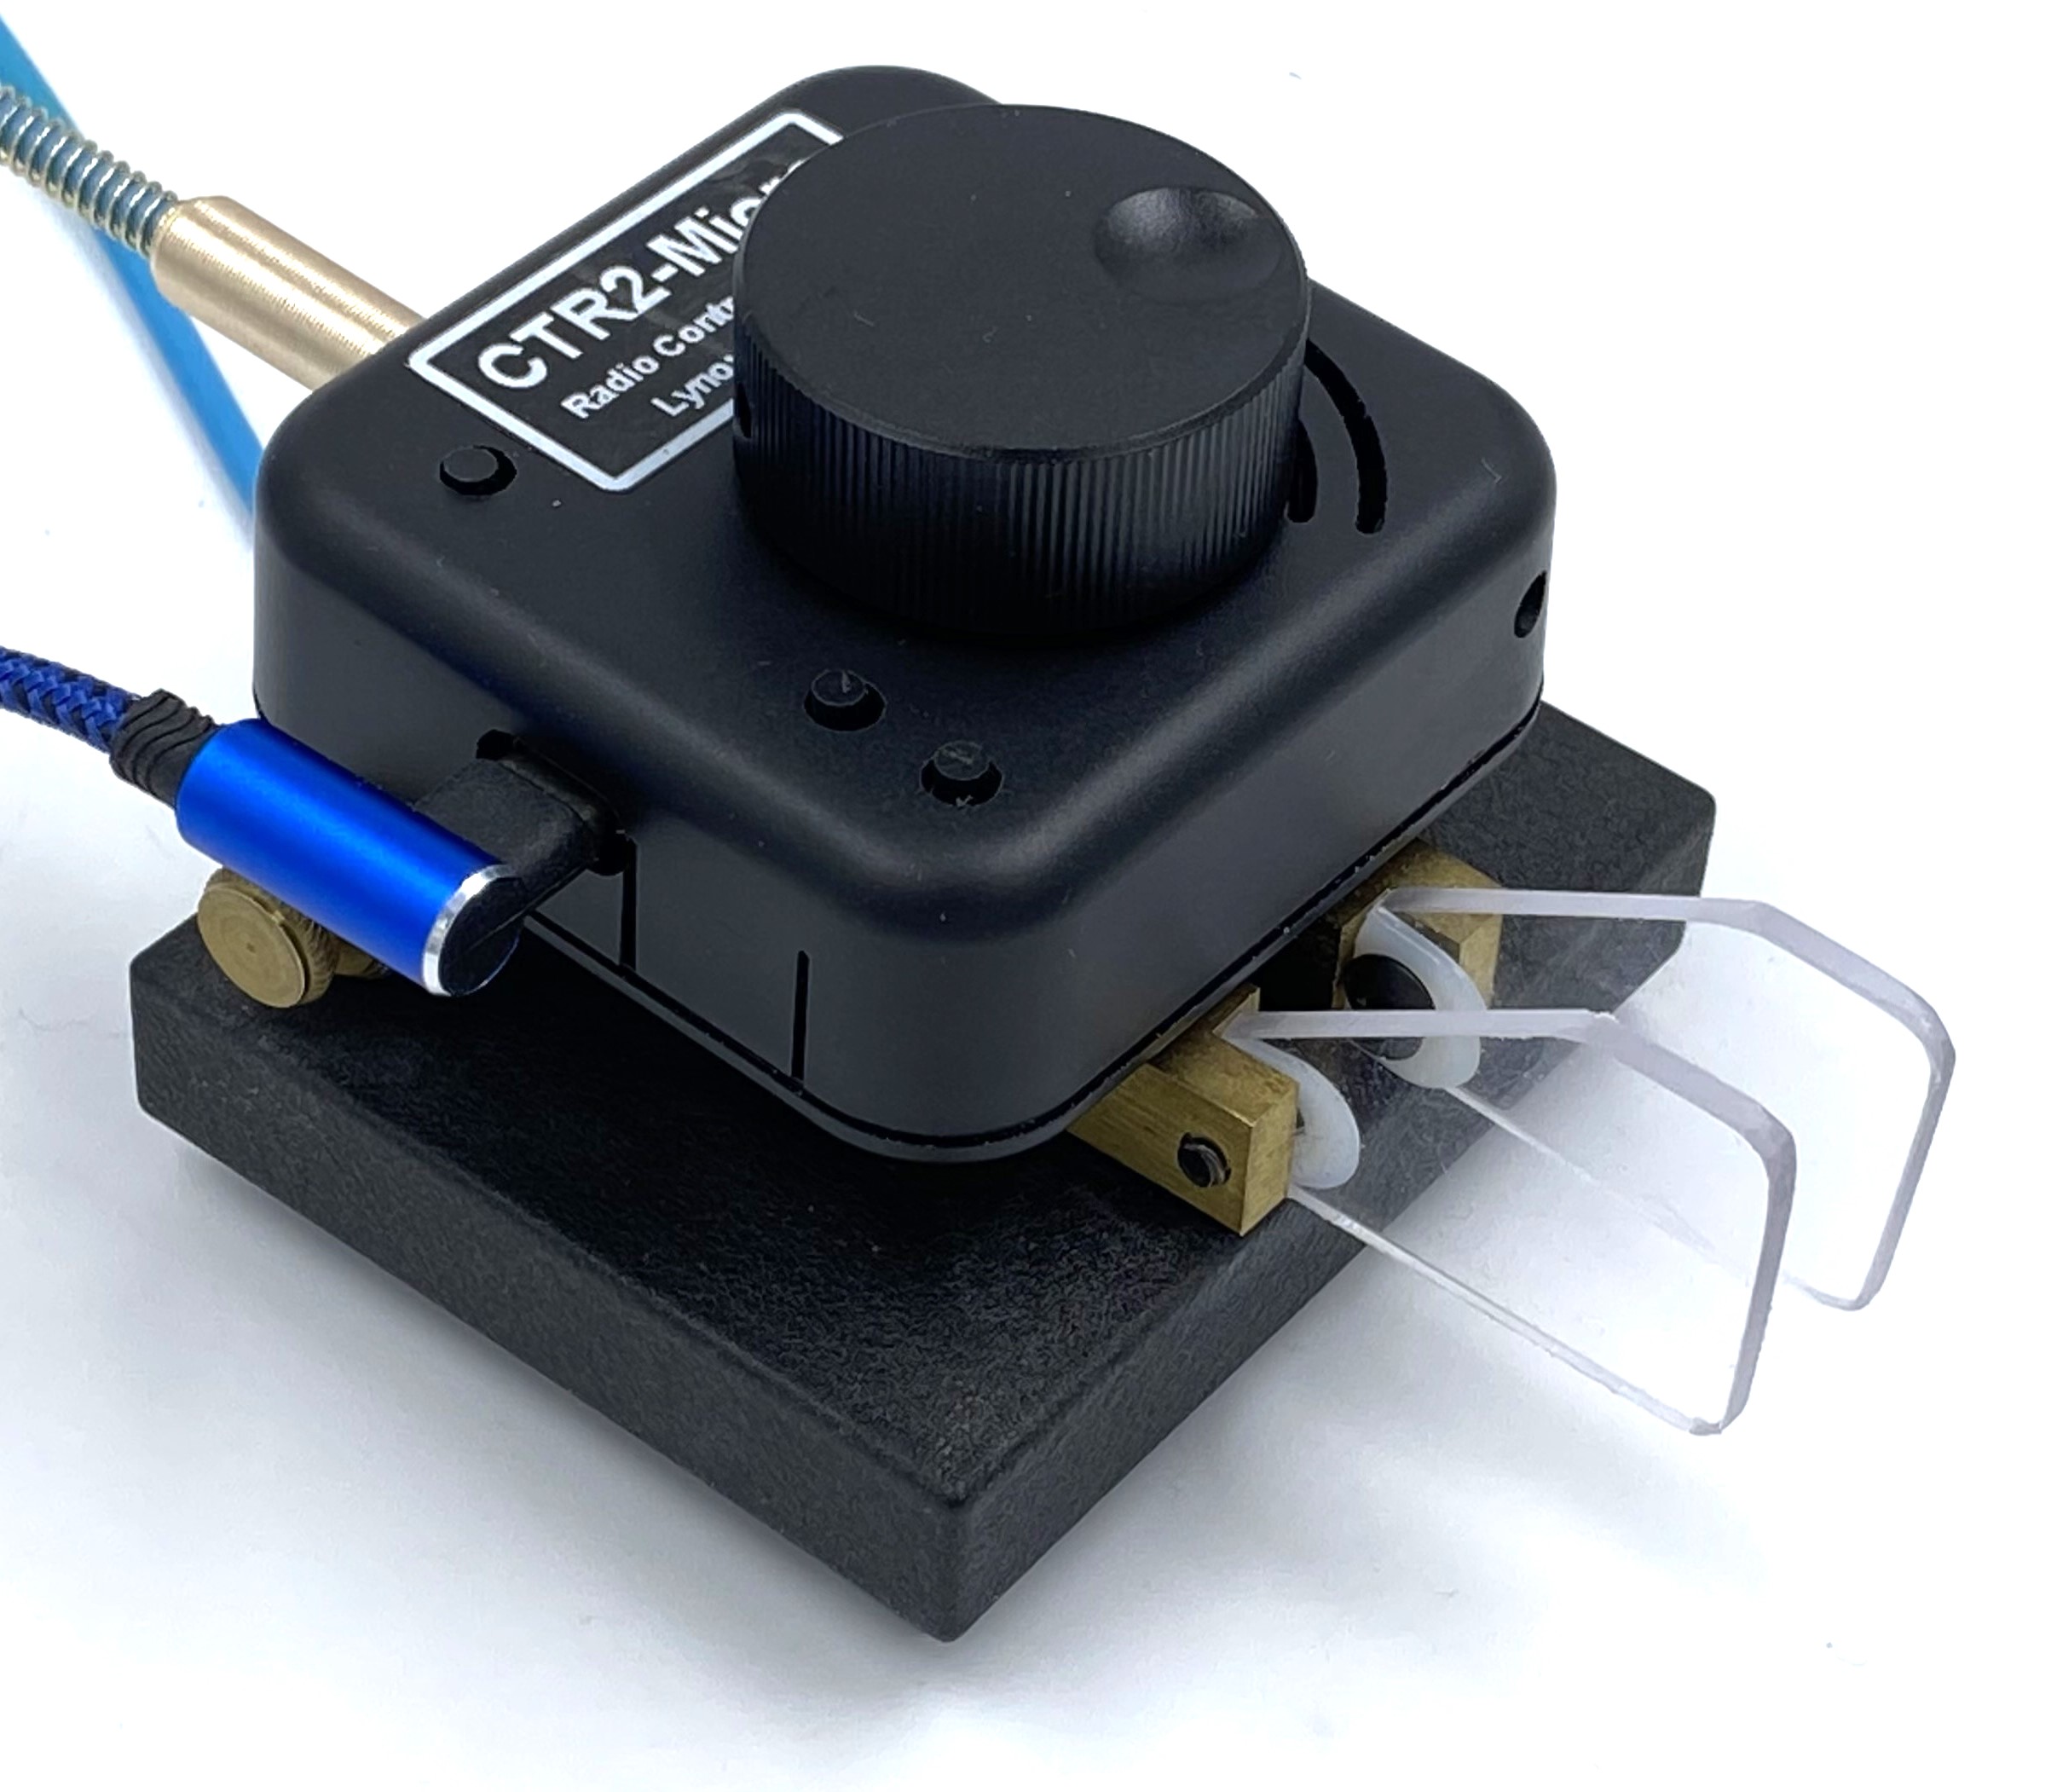
The Micro is small enough to fit next to your keyboard or your paddles. You can even mount it on top of many paddles!
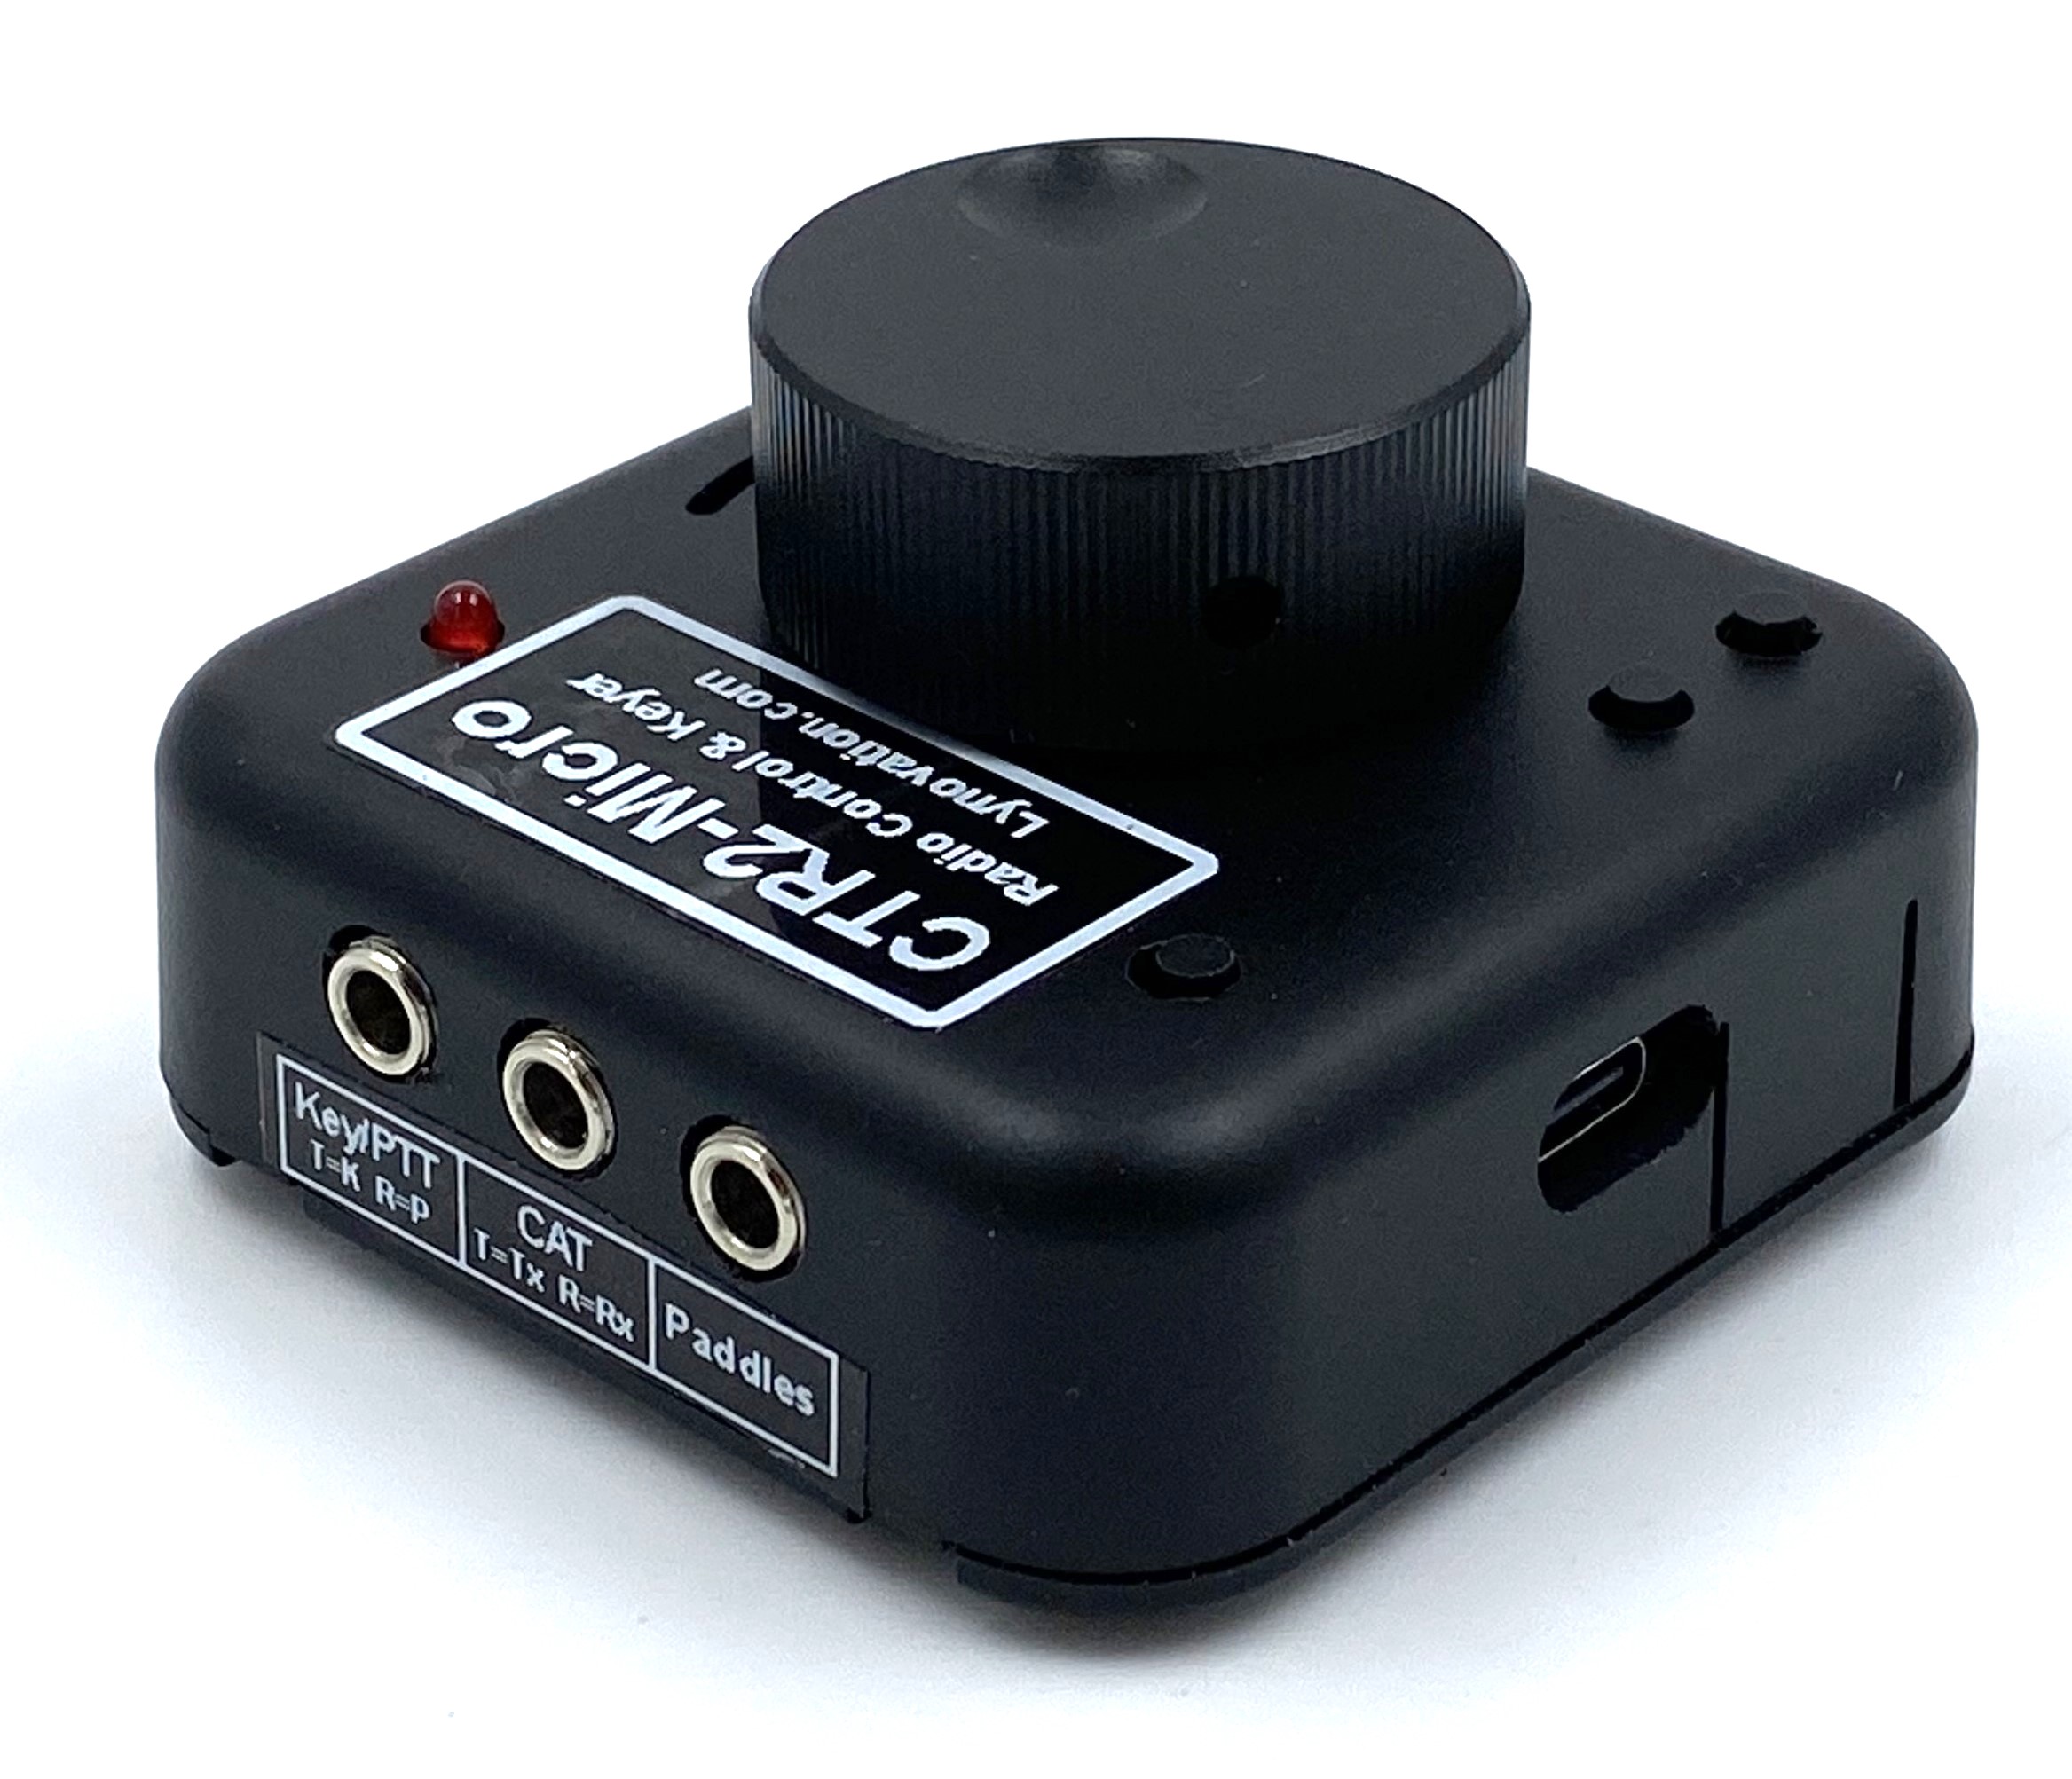
The Micro can control many radios such as the Flex 6000 series, ANAN, Hermes Lite 2, and most modern radios with a legacy serial CAT port or radios that support Hamlib rigCtl over the network. It cannot control radios with USB only CAT ports like the IC-705 or Xiegu X6100/X6200. It includes built-in serial CAT polarity strapping (TTL, RS232, and CI-V), an external DIP switch option, a memory/contest keyer, keyboard keyer, three programmable multi-function buttons (for those buried radio options like panadapter gain), programmable power-up mode, external tuner mode (sets your radio’s mode and Tx power so you can tune your external antenna tuner then restores them on exit), a code practice mode, a beacon controller mode, and has a built-in browser interface.
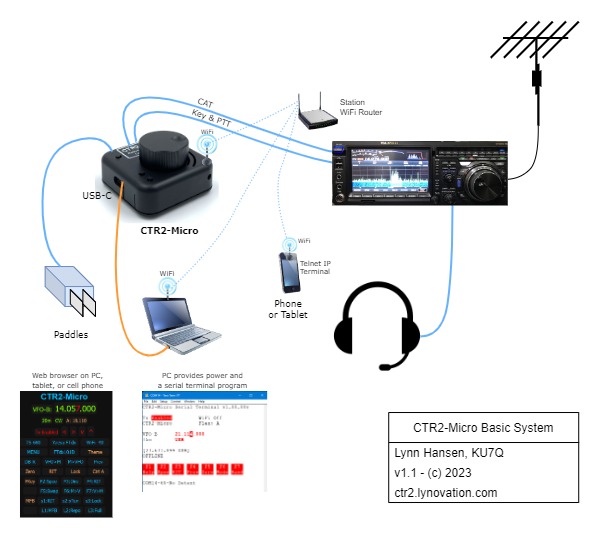
The Micro is easy to add to your station. Just plug it in to a USB socket on your PC, plug in your paddles, CAT and Key/PTT cables, and tell the Micro what radio you’re running. That’s it!
You love the tuning options the Micro offers including quick tuning resolution changes (just press the encoder and turn it), fractional tuning digits (5 Hz, 50 Hz, 500 Hz, etc), zeroing of the digits below the tuning digit (for exact frequencies), RIT, up to 100 favorite frequencies per VFO, a previously visited frequency list, tuning from the favorite list, and range tuning (great for contests and linear satellite transponders), and control over both VFOs on your radio.
Terminal Display
I intentionally eliminated the display from the Micro. Displays are expensive, difficult to install, and fragile. They also take processor I/O pins which the ESP32-C3 doesn’t have enough of! With no display the Micro is rugged enough to just throw it in your POTA bag and head out.
To configure the Micro you’ll need to connect to its USB serial port with a Telnet terminal, such as Tera Term or Putty. Once connected the Home page will open.
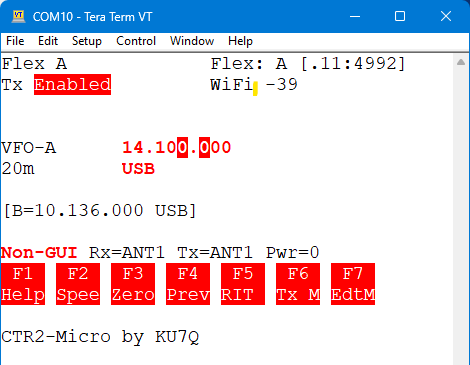
If you’ve used CTR2-Mini this will look pretty familiar to you. Press the encoder or [Enter] on your keyboard to open the menu system. The menu system will also look familiar to you, with a few new options.

Menu navigation is done with the encoder, cursor Up/Down keys, or by pressing the highlighted hotkey on the menu. You can even use your paddles to enter the hotkey.
The terminal app on your PC can be minimized and only brought back up when you want to change options. I doesn’t need to be “in focus” unless you want to use the keyboard keyer option.
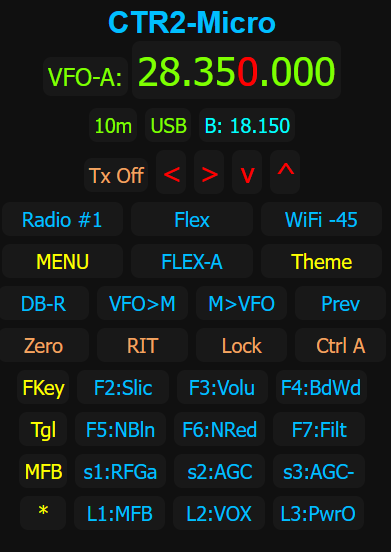
Web Browser
The web server feature allows you to monitor and control the Micro from your tablet or cell phone. Just enter the Micro’s IP address into your browser’s address bar and you can control the Micro with instant access to the pre-programmed functions and CW buffers. This is a great option if you want to operate your radio from another location in your house. Just install an audio server such as SonoBus or Mumble on your PC and phone to send audio to and from the radio.
You can power the Micro with a USB phone charger, an OTG cable, or even a USB portable battery. On newer Apple devices with USB-C connectors you just need a USB-C to USB-C cable.
Can I operate the Micro without a computer?
The Micro can be run standalone if all you want is a remote tuning knob and a keyer. You can also open a terminal connection or web browser on you PC to view and control the advanced options of the Micro. The nice thing about this is that unlike dedicated radio control programs these programs do not need to be “in focus” on your computer to make changes on your radio.
I have several other options that allow you to access the Micro’s advanced features without a computer. These are presented below.
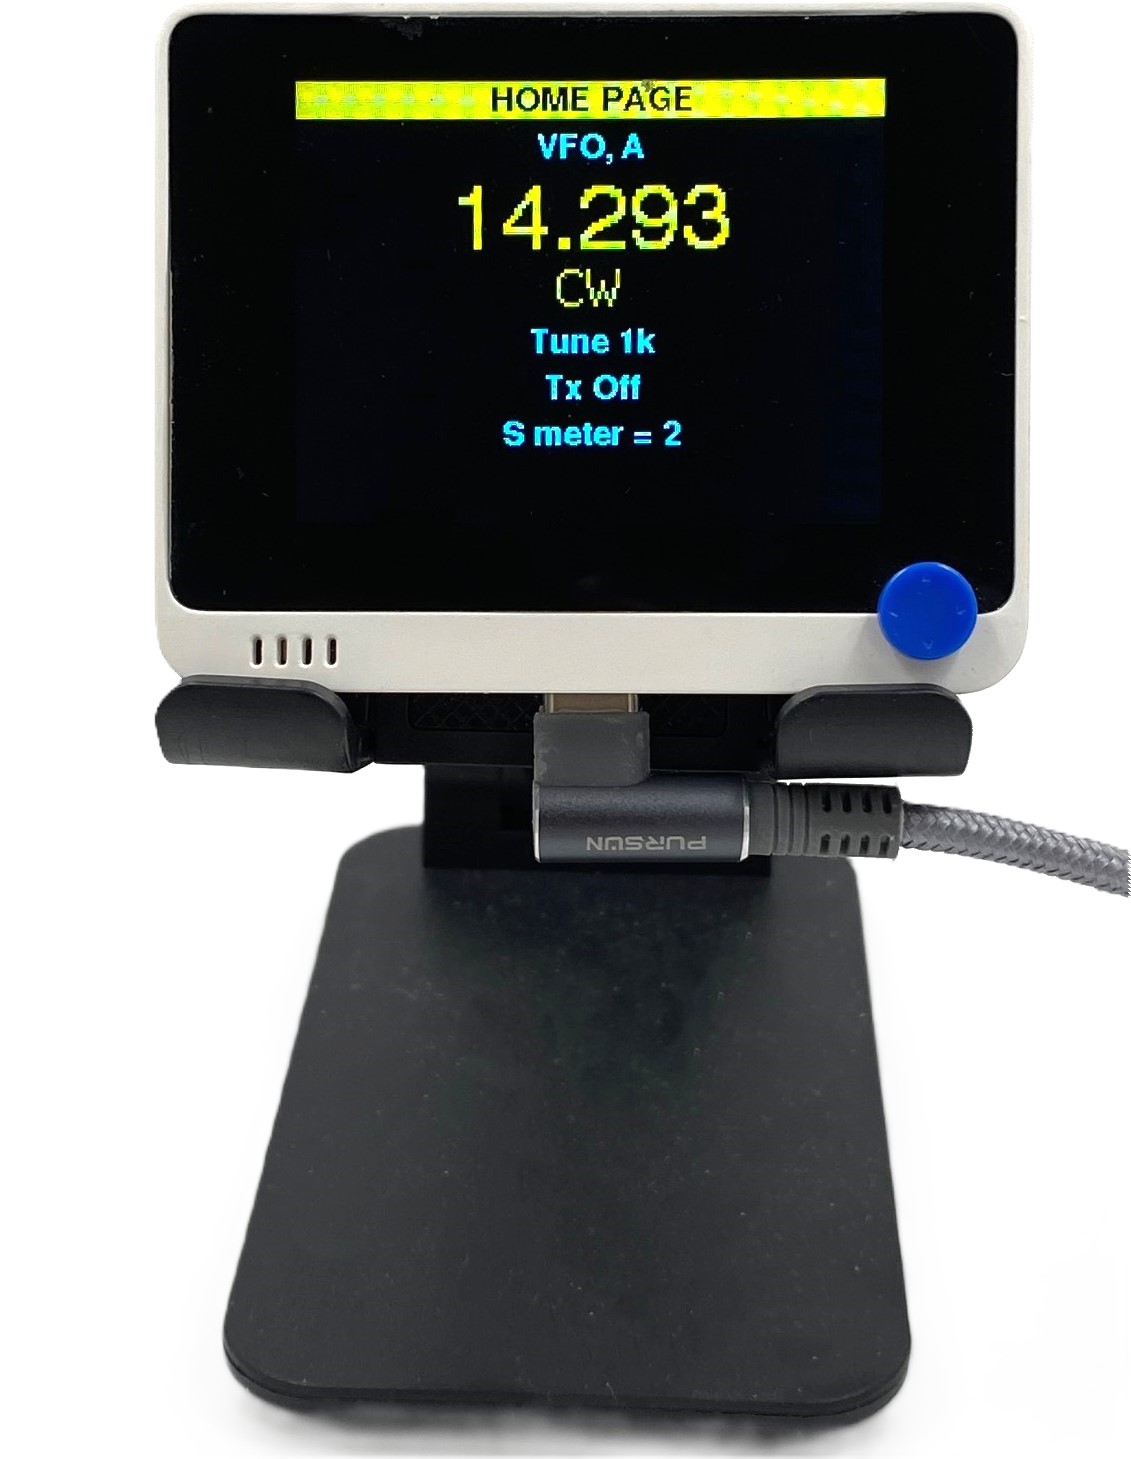
CTR2-Display
CTR2-Display is another way to interact with the Micro. This option is free firmware that runs on a Seeed Studio Wio Terminal and connects to the Micro using WiFi. It provides a simple display terminal that can be positioned anywhere in your shack. It’s designed to allow the Micro to be used without a terminal program or web browser and doesn’t require a computer, tablet, or cell phone.
All you need to deploy this option is a Wio Terminal and the free CTR2-Display firmware that you can download here. You will need to do a one time update the eRPC firmware on the Wio Terminal when you receive it. The instructions to do this can be found here.
Standalone Operation
I designed the Micro so that it can operate as a standalone device. For basic functions like tuning your radio just turn it on and use it. You can even set up a Power On mode so that it always starts in a certain mode when it boots. For instance, you can program Power On to start with the keyer speed selected. In this mode, the encoder adjusts the keyer speed on power up so it’s a basic keyer. Or you may want to start it in RIT mode so it’s a dedicated RIT tuning knob on startup.
You can program the three multi-function buttons to execute functions too. You may want one to open the Tx Power setting, one to open the panadapter gain, and one to open the bandwidth control on your radio.
But what if you want to change bands, modes, select a CW buffer to send, or are blind or sight limited operator? Read on…
CW Report
The Micro includes a Code Report option. When you enable this option the Micro will output radio’s parameters and menu selections in code. If you’re proficient with the code, or want to be, this make an excellent user interface.
Not everyone knows the code, or wants to use it for radio control so a speech synthesizer has been added to the CTR2 line up…
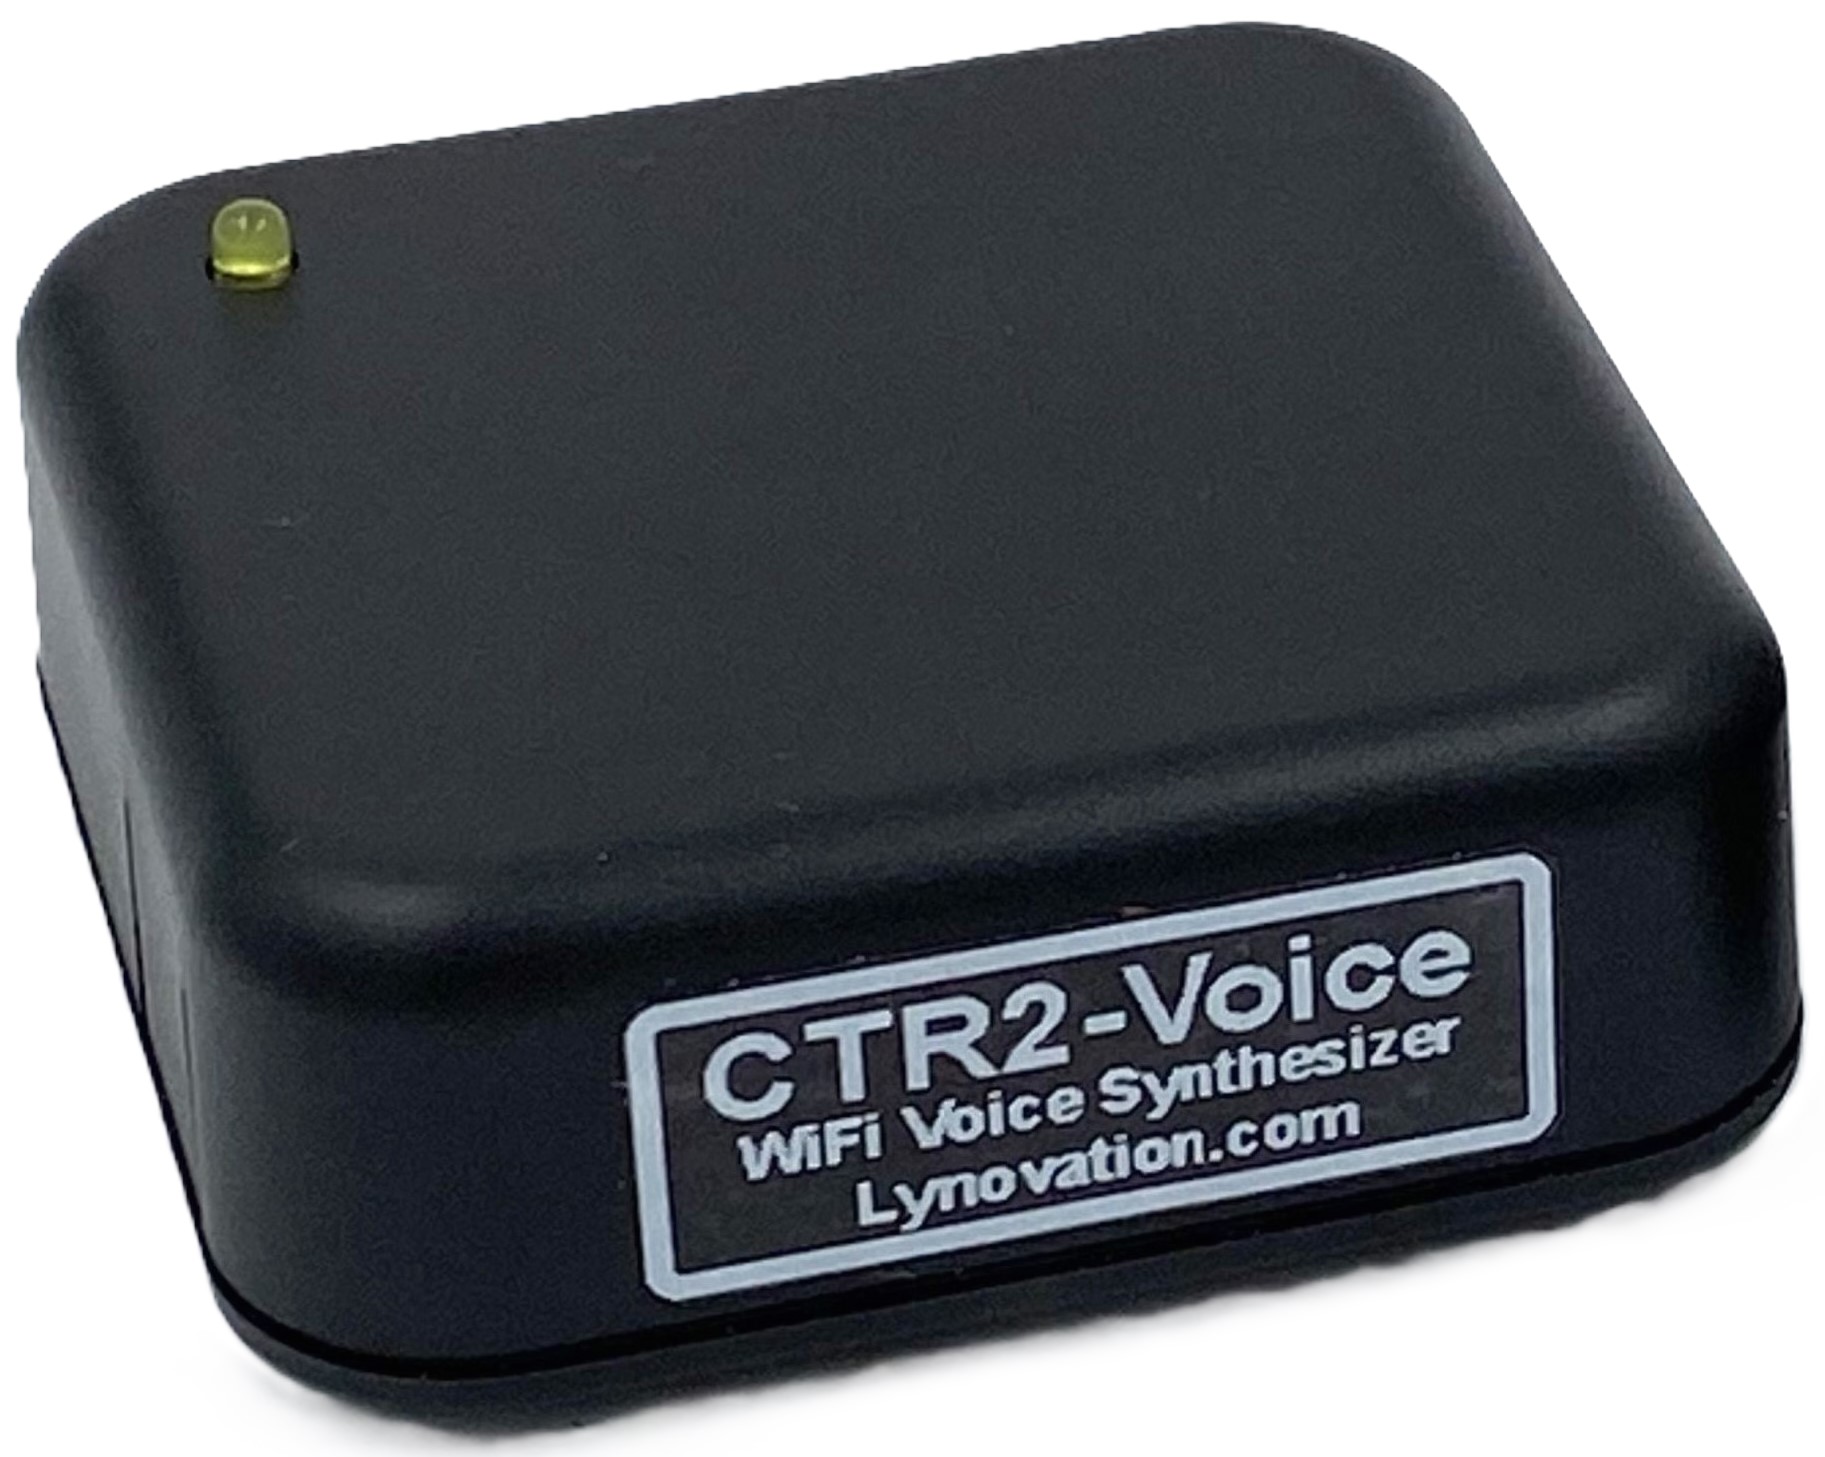
CTR2-Voice
CTR2-Voice is a WiFi linked text-to-speech synthesizer that was designed to allow full Micro control without a display. In essence, it vocalizes the radio settings and menu selections so no display is required. All it requires is a USB-C power connection and a powered speaker with a 3.5mm (1/8″) phone jack (or plug).
It has the ability to create a WiFi access point so you connect the Micro to it in the field for POTA activation’s or Field Day activities. No WiFi/Hotspots required.
This greatly increases accessibility to amateur radio for blind and sight limited operators because it works with every radio the Micro supports, not just a select few.
Works with Flex
As I mentioned above, the Micro works with the Flex 6000 Signature series radios. This opens several opportunities. You can use your Micro as a physical tuning knob while running SmartSDR on your PC. You can also use the network Keying and PTT options so you can key your radio from anywhere. You can add additional Micros and have one for each slice, or use them for dedicated functions.
And yes, the Micro works with the Apple variants of SmartSDR too. Use your tablet or cell phone running SmartSDR and connect the Micro to your radio as a “non-GUI interface” to add a physical tuning knob. Enable network CW and you have a complete portable CW package. You might also consider the CTR2-MIDI to directly control SmartSDR so you can use SmartLink to remotely control your radio.
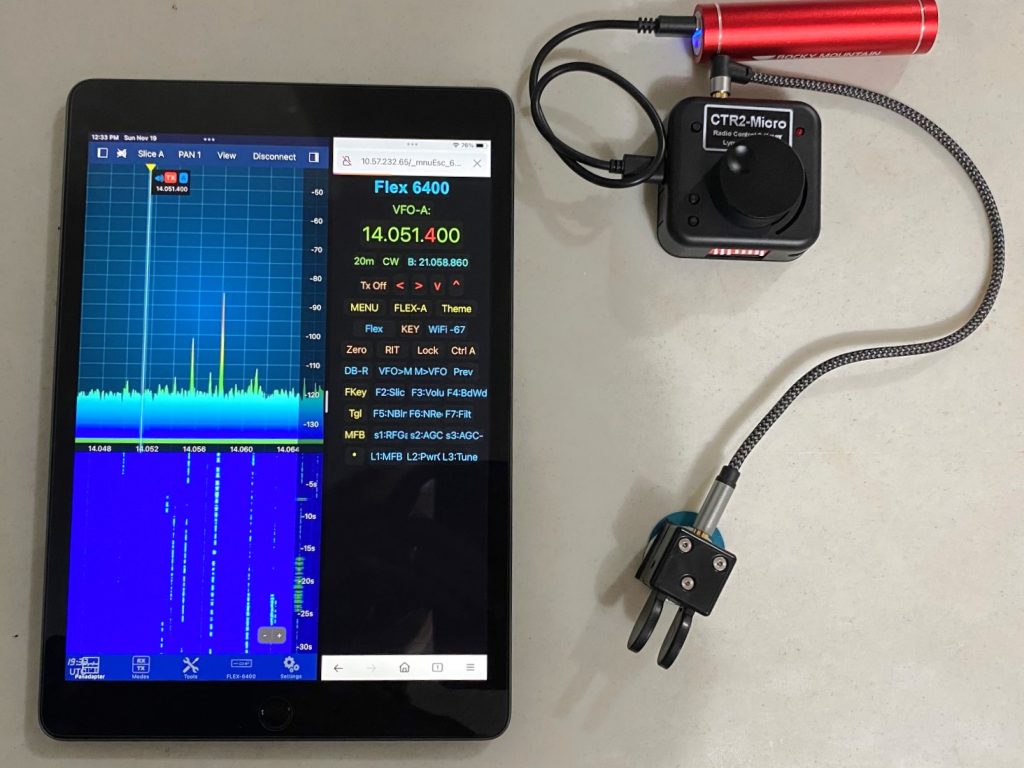
iOS SmartSDR with CTR2-Micro running split screen on an iPad
Here’s a nice video of Mike, WB6DJI, operating CQWW HF remotely using his iPad and Micro running SmartSDR and the Micro’s web interface in split screen.