
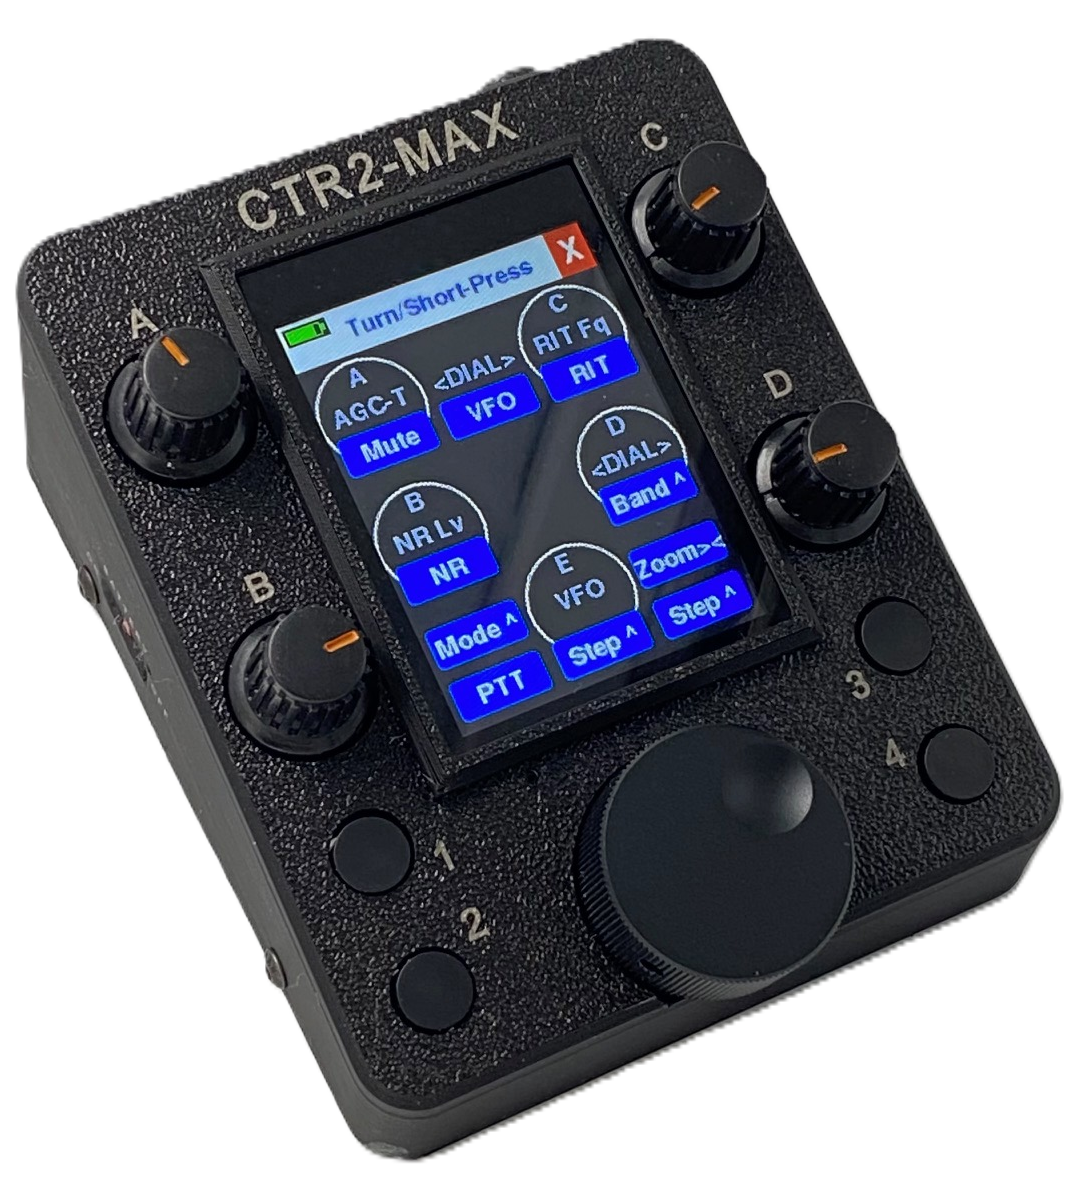
CTR2-Max offers a larger display, more knobs and pushbuttons, and better sidetone when operating in direct Flex WiFi mode.
This firmware runs on the new CTR2-Max-5 unit. It will also run on the CTR2-Max-1 and CTR2-Max-2 (shown above) once they reach production.
Download the latest firmware here.
October 5, 2026 – v1.01.03a
- This version fixes a bug I unknowingly injected into v1.01.01 that erased the map name in MIDI mode.
- v1.01.03a has a minor fix to allow Auto Connect to work properly
Download the Firmware
Download the latest firmware using the link below. The zip file ships with the firmware manuals for both Flex WiFi and MIDI mode. It also includes the hardware manuals for CTR2-Max-5.
NOTE: There is only one BIN file, named CTR2-Max_v1.0x.xx.bin. Extract this file to a folder on your PC.
Flashing the Firmware
I highly recommend using ESPConnect with a Chrome, Opera, or Edge browser to flash this firmware because you usually don’t need to force the ESP32-S3 processor into Boot mode.
NOTE: ESPConnect does not run on Linux.
NOTE: The ESP32-S3 operates in TinyUSB Serial mode, and this mode will be listed in ESPConnect when you first connect to your unit. When you try to connect to TinyUSB, the connection will fail. Just click the Connect button again in ESPConnect. On the second try, your unit will be listed as a USB JTAG/serial debug unit device on a different serial port. You should be able to connect to this device.
NOTE: If ESPConnect can’t force your unit into programming mode (USB JTAG) automatically, you’ll need to use a small screwdriver to press and hold the Boot button on the back of the unit while you cycle power (or use another small screwdriver to press and release the Reset button on other side of the USB-C connector.)
Once you are connected to the unit, click on Flash Tools in the left menu, then scroll down to the Flash Firmware text box. Click on this box then navigate to the folder you unzipped CTR2-Max.bin and select it.
Leave the Flash Offset set to 0x0.
Do not select the “Erase entire flash before writing” checkbox. This will erase the entire flash memory, including your configuration files and registration key.
Click the Flash Firmware button to start the flash process. Once it complete, cycle the power on your unit and verify that the firmware version matches the version listed here.
Revision History
September 29, 2026 – v1.01.03
- Removed RADE mode that was added in v2.05.04. Not supported by Flex API so it can’t be controlled remotely
- Added an UNKN radio mode label – for when the radio sends a mode CTR2-Flex doesn’t understand
- Ignore “transmit frequency” from API for dial control – it shows the repeater offset frequency in TX mode and cause erratic tuning behavior
September 28, 2026 – v1.01.01
- Fixed RTTY mode bug that was causing erratic tuning when in RTTY mode
- Added support for NFM and RADE modes, including default filters
- Added panadapter Auto-Center toggle to Panadapter1 dashboard page – when enabled, tuning can appear choppy as panadapter redraws for every tune step
- Improved transverter detection so extended bands are shown when transverter is enabled on RxAnt or TxAnt
- Added “&” character to character list – for users that have a & in their router password
September 14, 2026 – v1.01.00
- Replaced the Knobs menu with the new Controls menu. This menu provides a graphical view of the knob and switch/pushbutton functions and allows you to easily change the functions assigned to each control.
August 16, 2026 – v1.00.02
- This version fixes several bugs in the MIDI mode firmware in the initial product release, v1.00.01. If you’re running v1.00.01, you should re-flash your unit with this firmware.
- No substantial changes were made in the Flex WiFi mode firmware.
August 3, 2026 – v1.00.01
- Initial product release firmware